In this post, we'll guide you through the process of importing Jira issues from a project into PowerBI, leveraging the API. You won't need any additional tools or coding expertise.
However, field formatting will be necessary, which we won't cover here. For those looking for a simpler solution, you might find using a free connector like Asinaria to be more convenient. Click the button below to sign up!
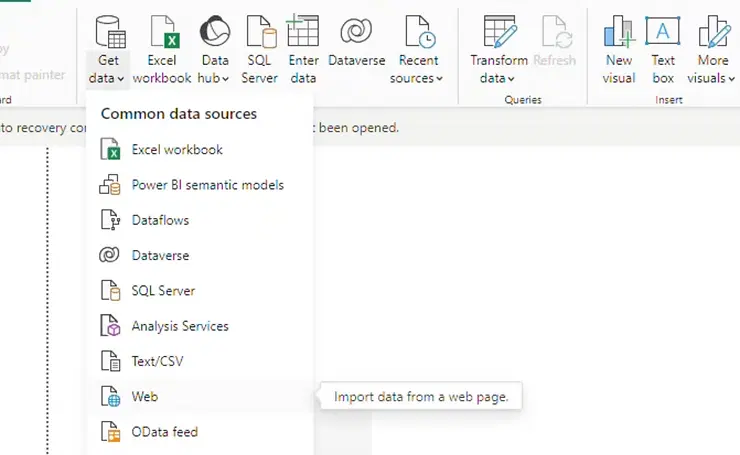
To import your Jira project data, we'll use the 'Web' import feature in PowerBI Desktop. Just click on this option to initiate process.
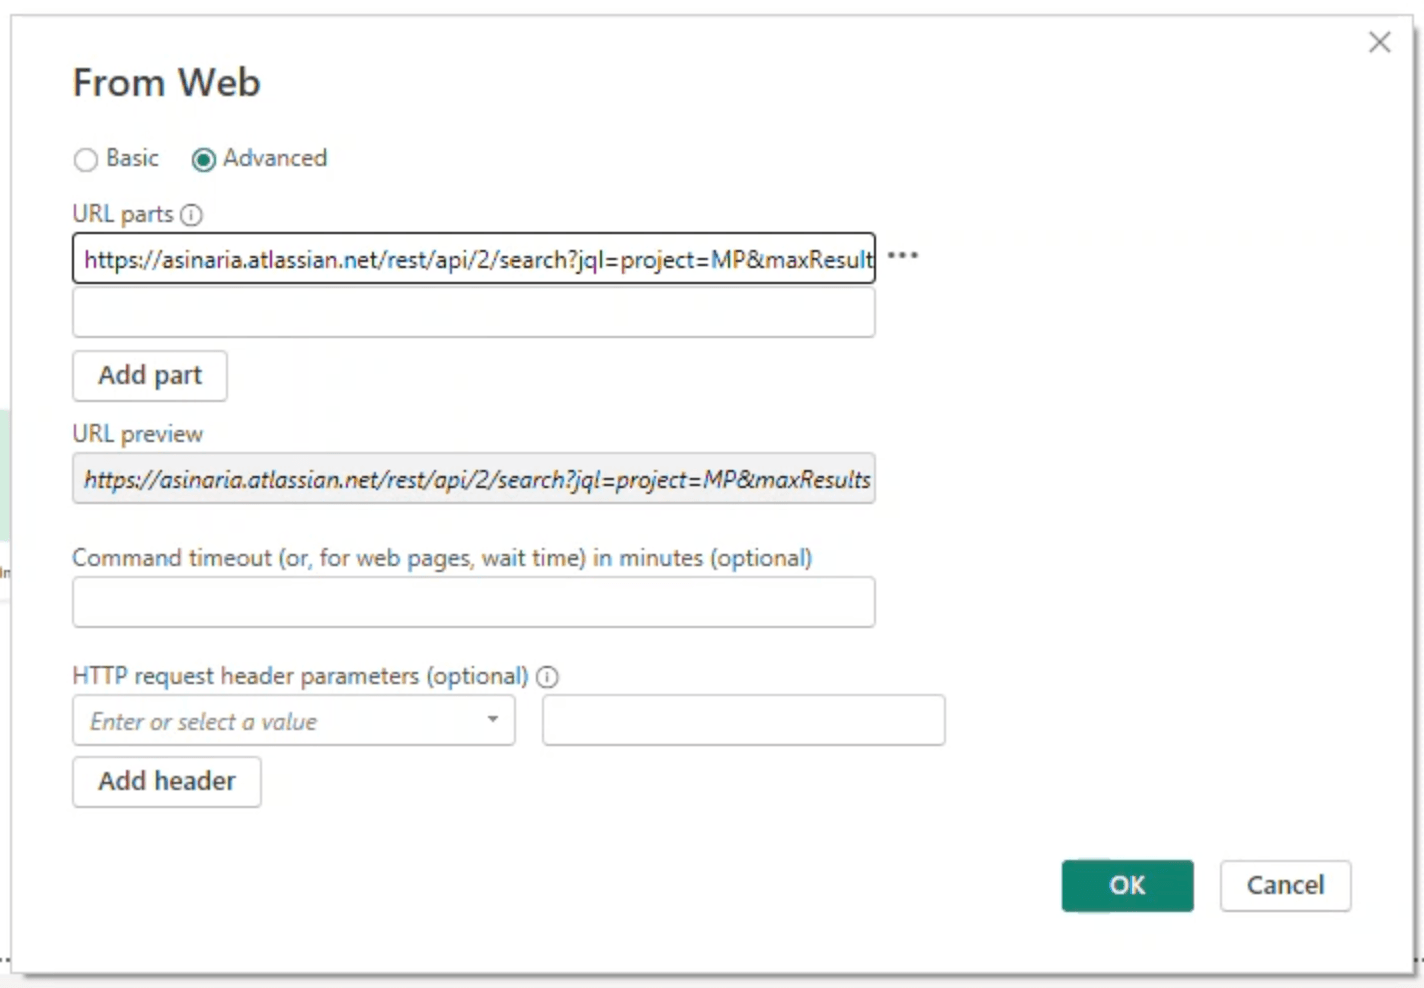
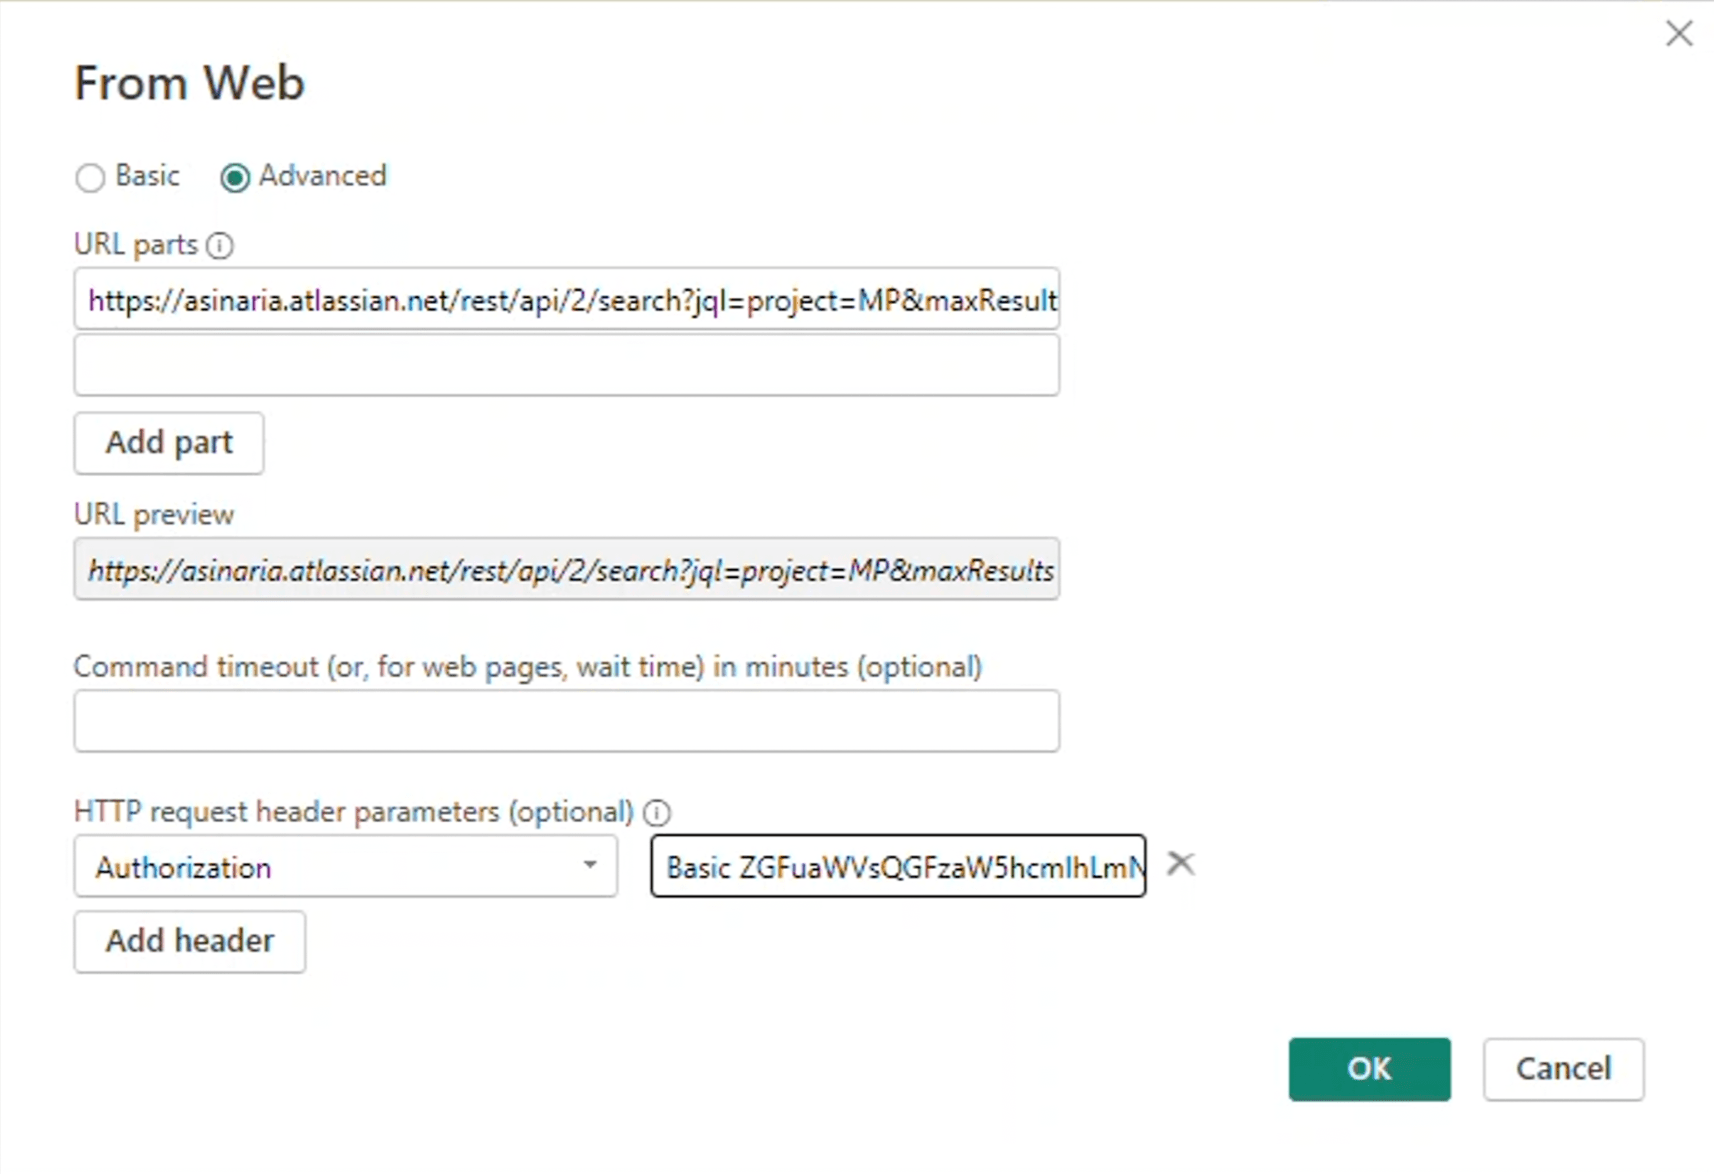
PowerBI will display a Window. Select the "Advanced" option. You should see a screen similar to the following.
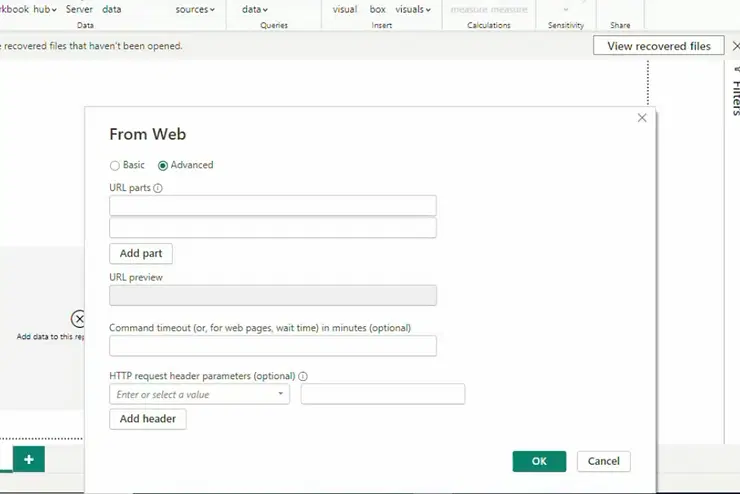
In the URL part, you will have to insert the Jira API URL for retrieving issues. You can go and check the documentation over here. Or you can just copy the following, it will work right away:
https://YOUR_DOMAIN.atlassian.net/rest/api/2/search?jql=project=YOUR_PROJECT_ID&maxResults=1000
Replace YOUR_DOMAIN with your Jira domain. To get it, just go to Jira and check the URL
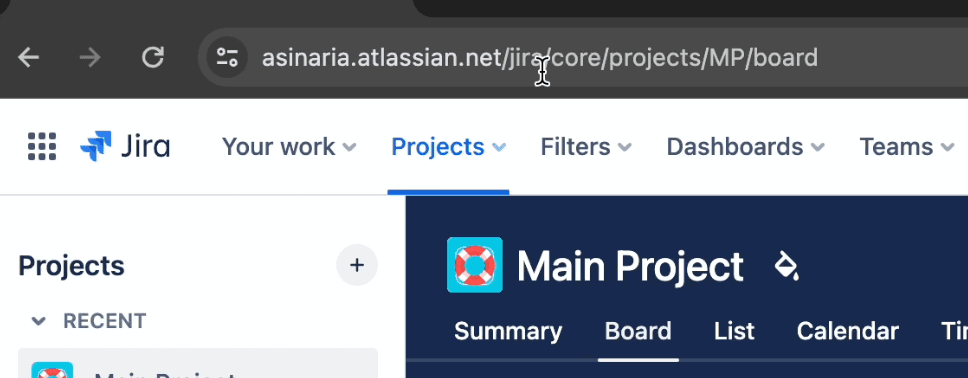
You should see a link that looks like this one. The text before atlassian is the domain
https://asinaria.atlassian.net/jira/core/projects/MP/board
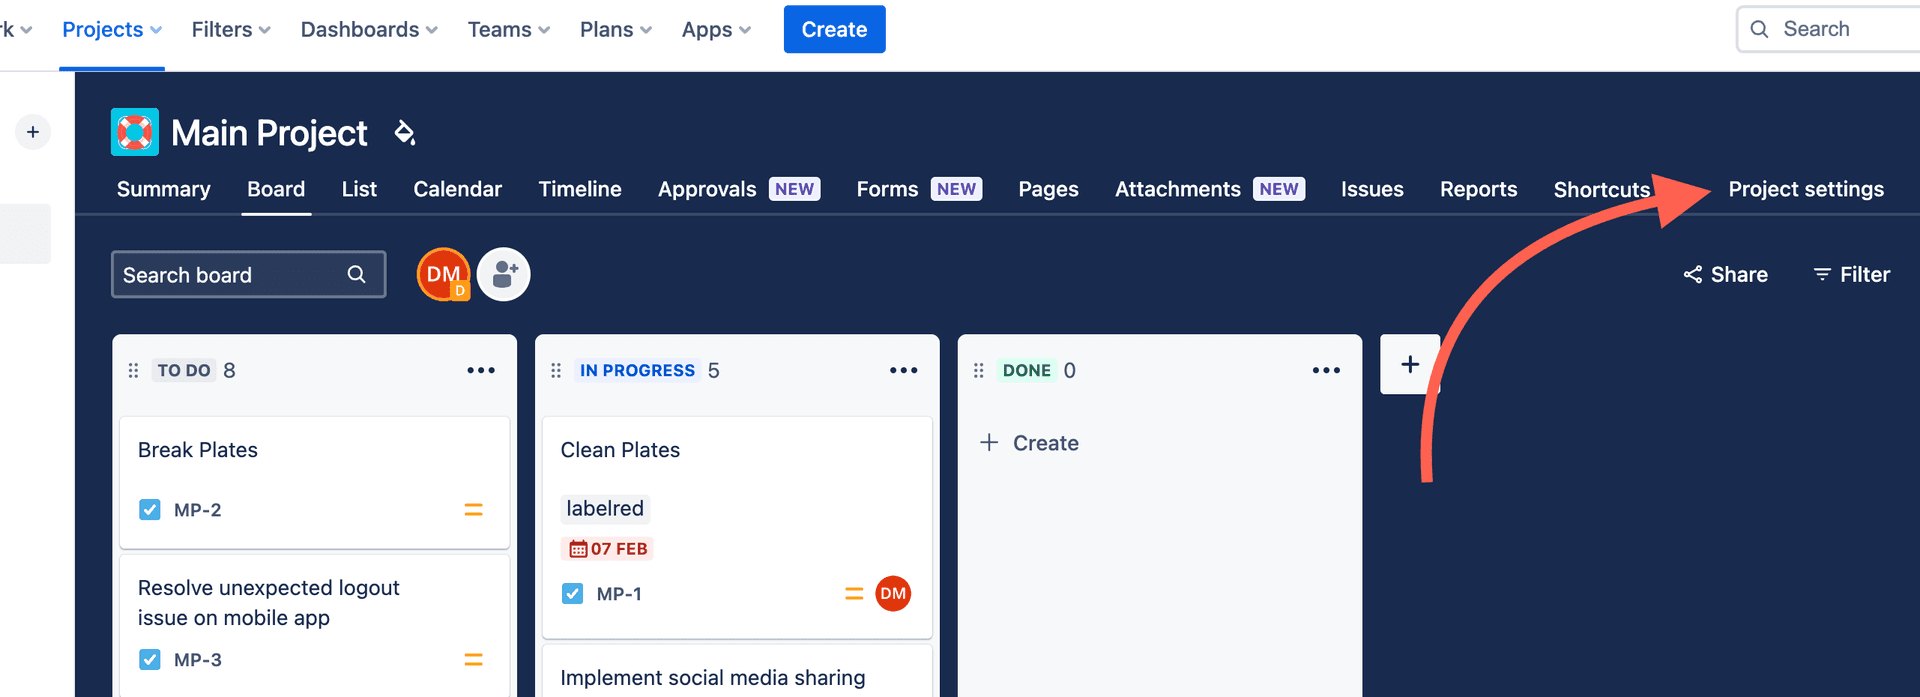
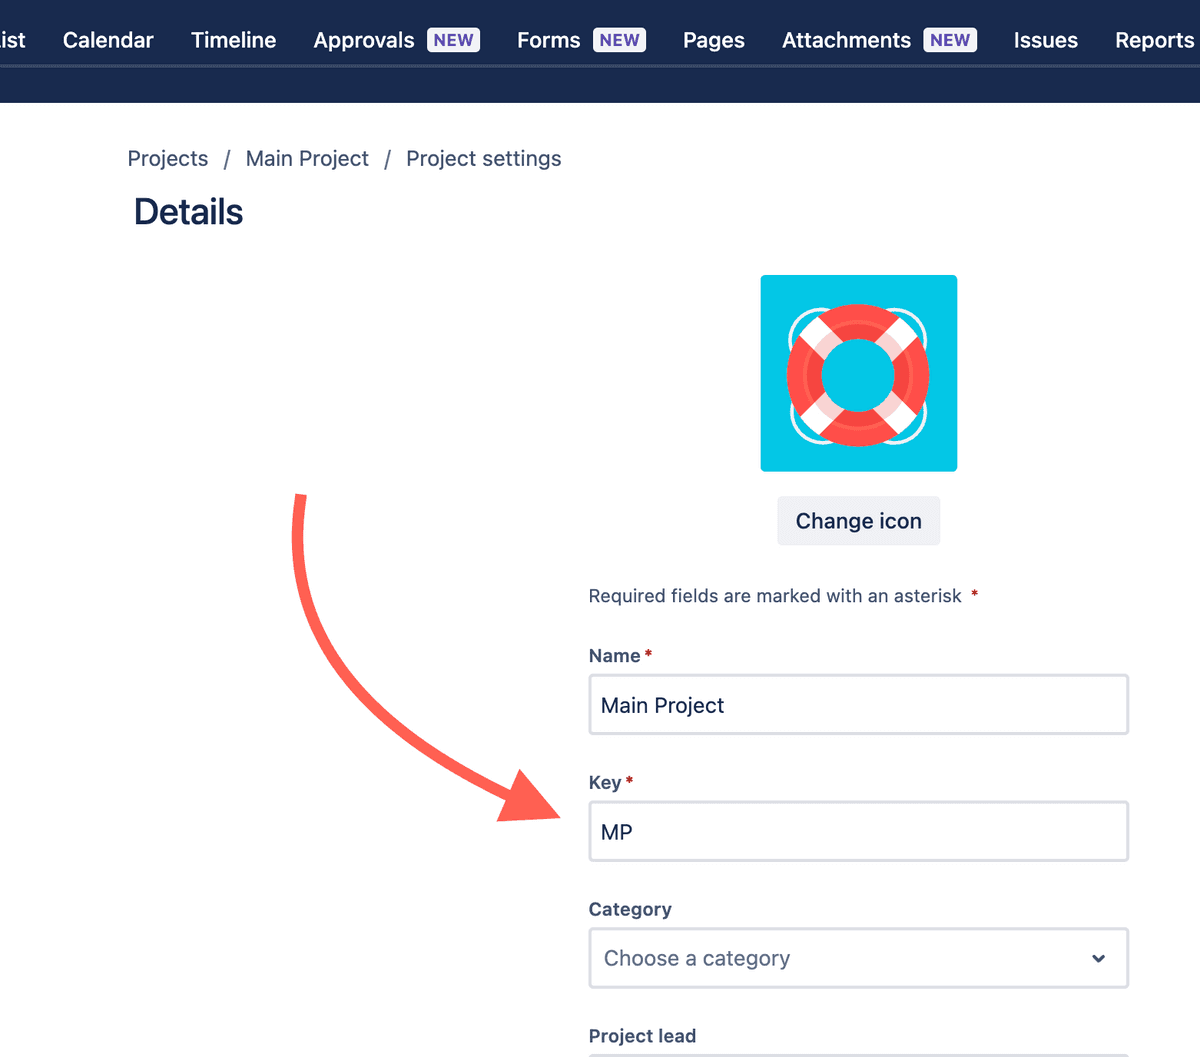
Now you'll need to replace YOUR_PROJECT_ID with your project's key which you want to import issues from. To get it, go to your project and select the Project settings view
Then copy the key located just below the Key label
Replace that Key into the URL, and paste into PowerBI. It should look similar to this:
Now, in the 'HTTP request header parameters' section, type Authorization in the left box.
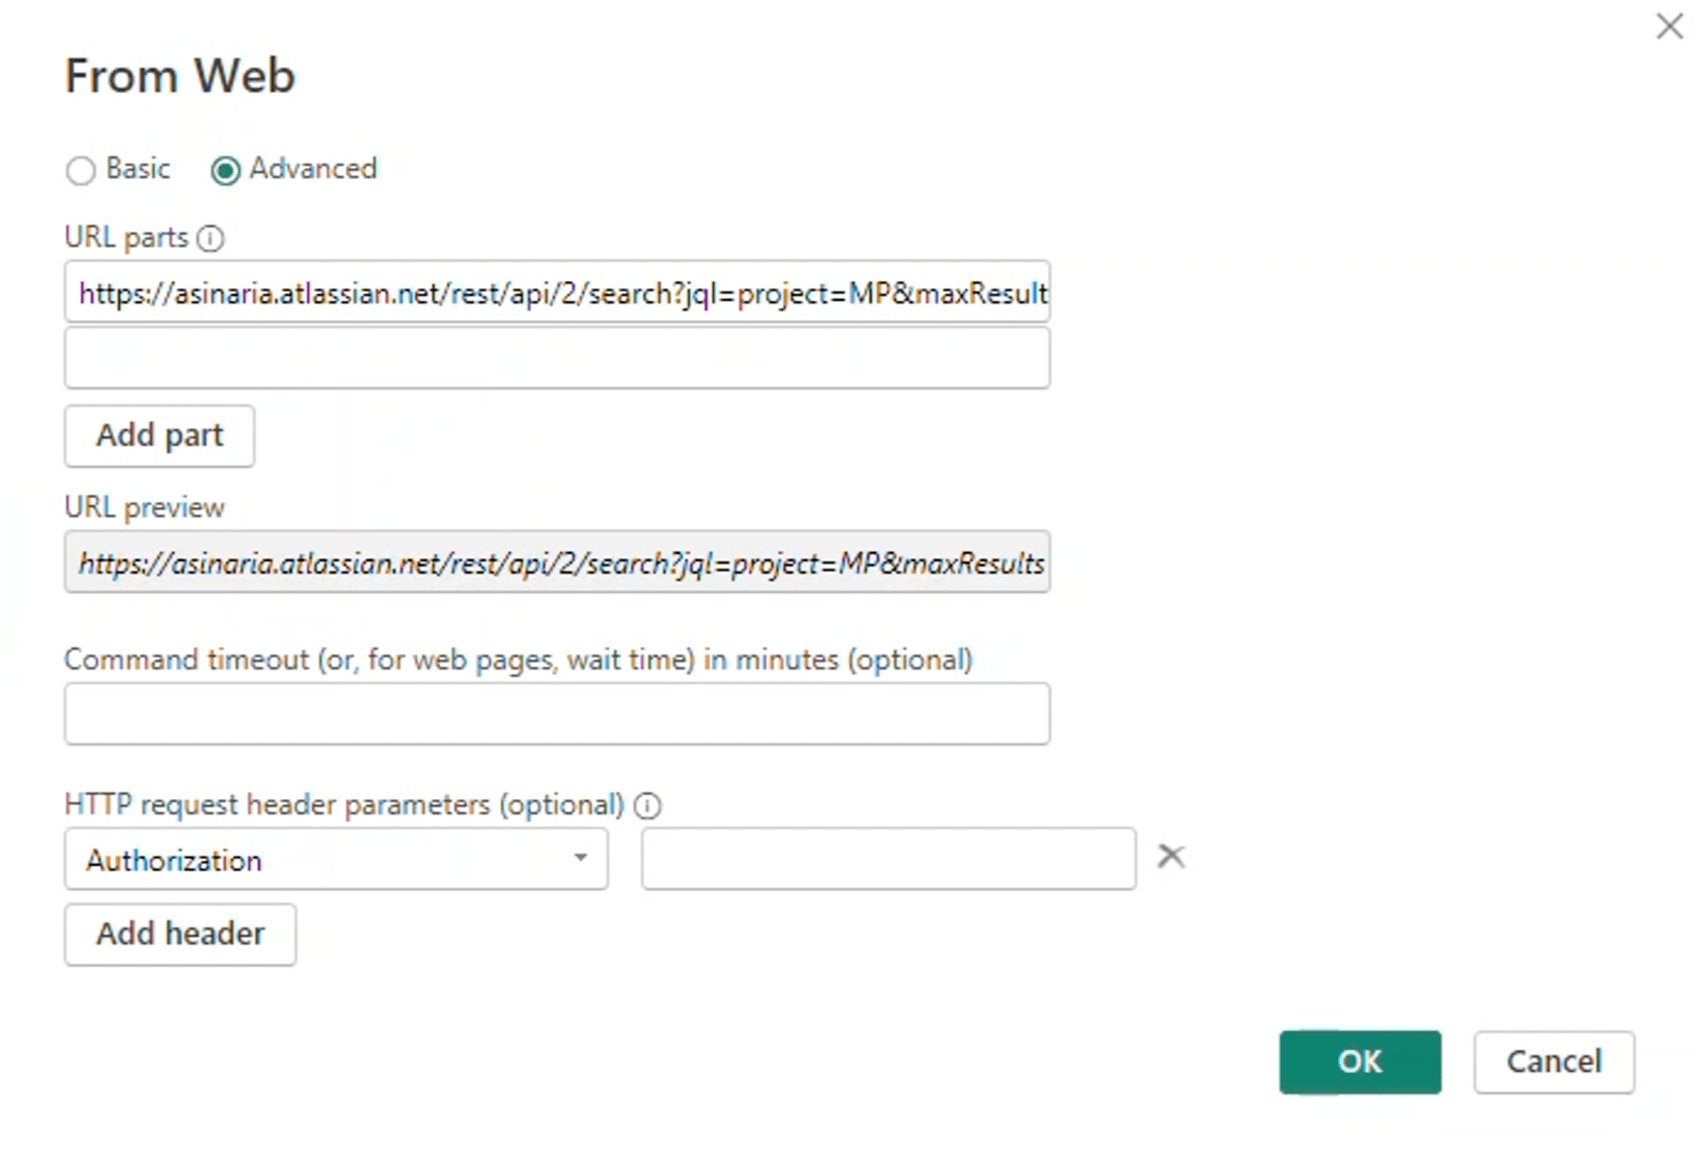
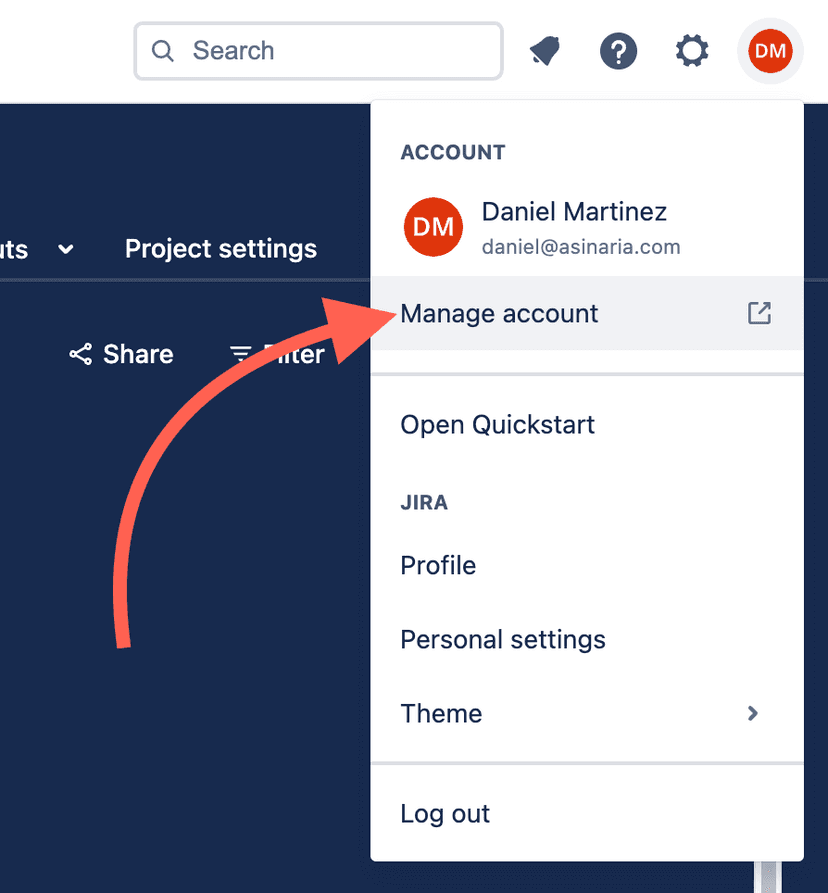
In the right box, you'll enter the authorization token. I'll guide you on how to get it. In Jira, click your profile at the top right. Then, choose Manage account.
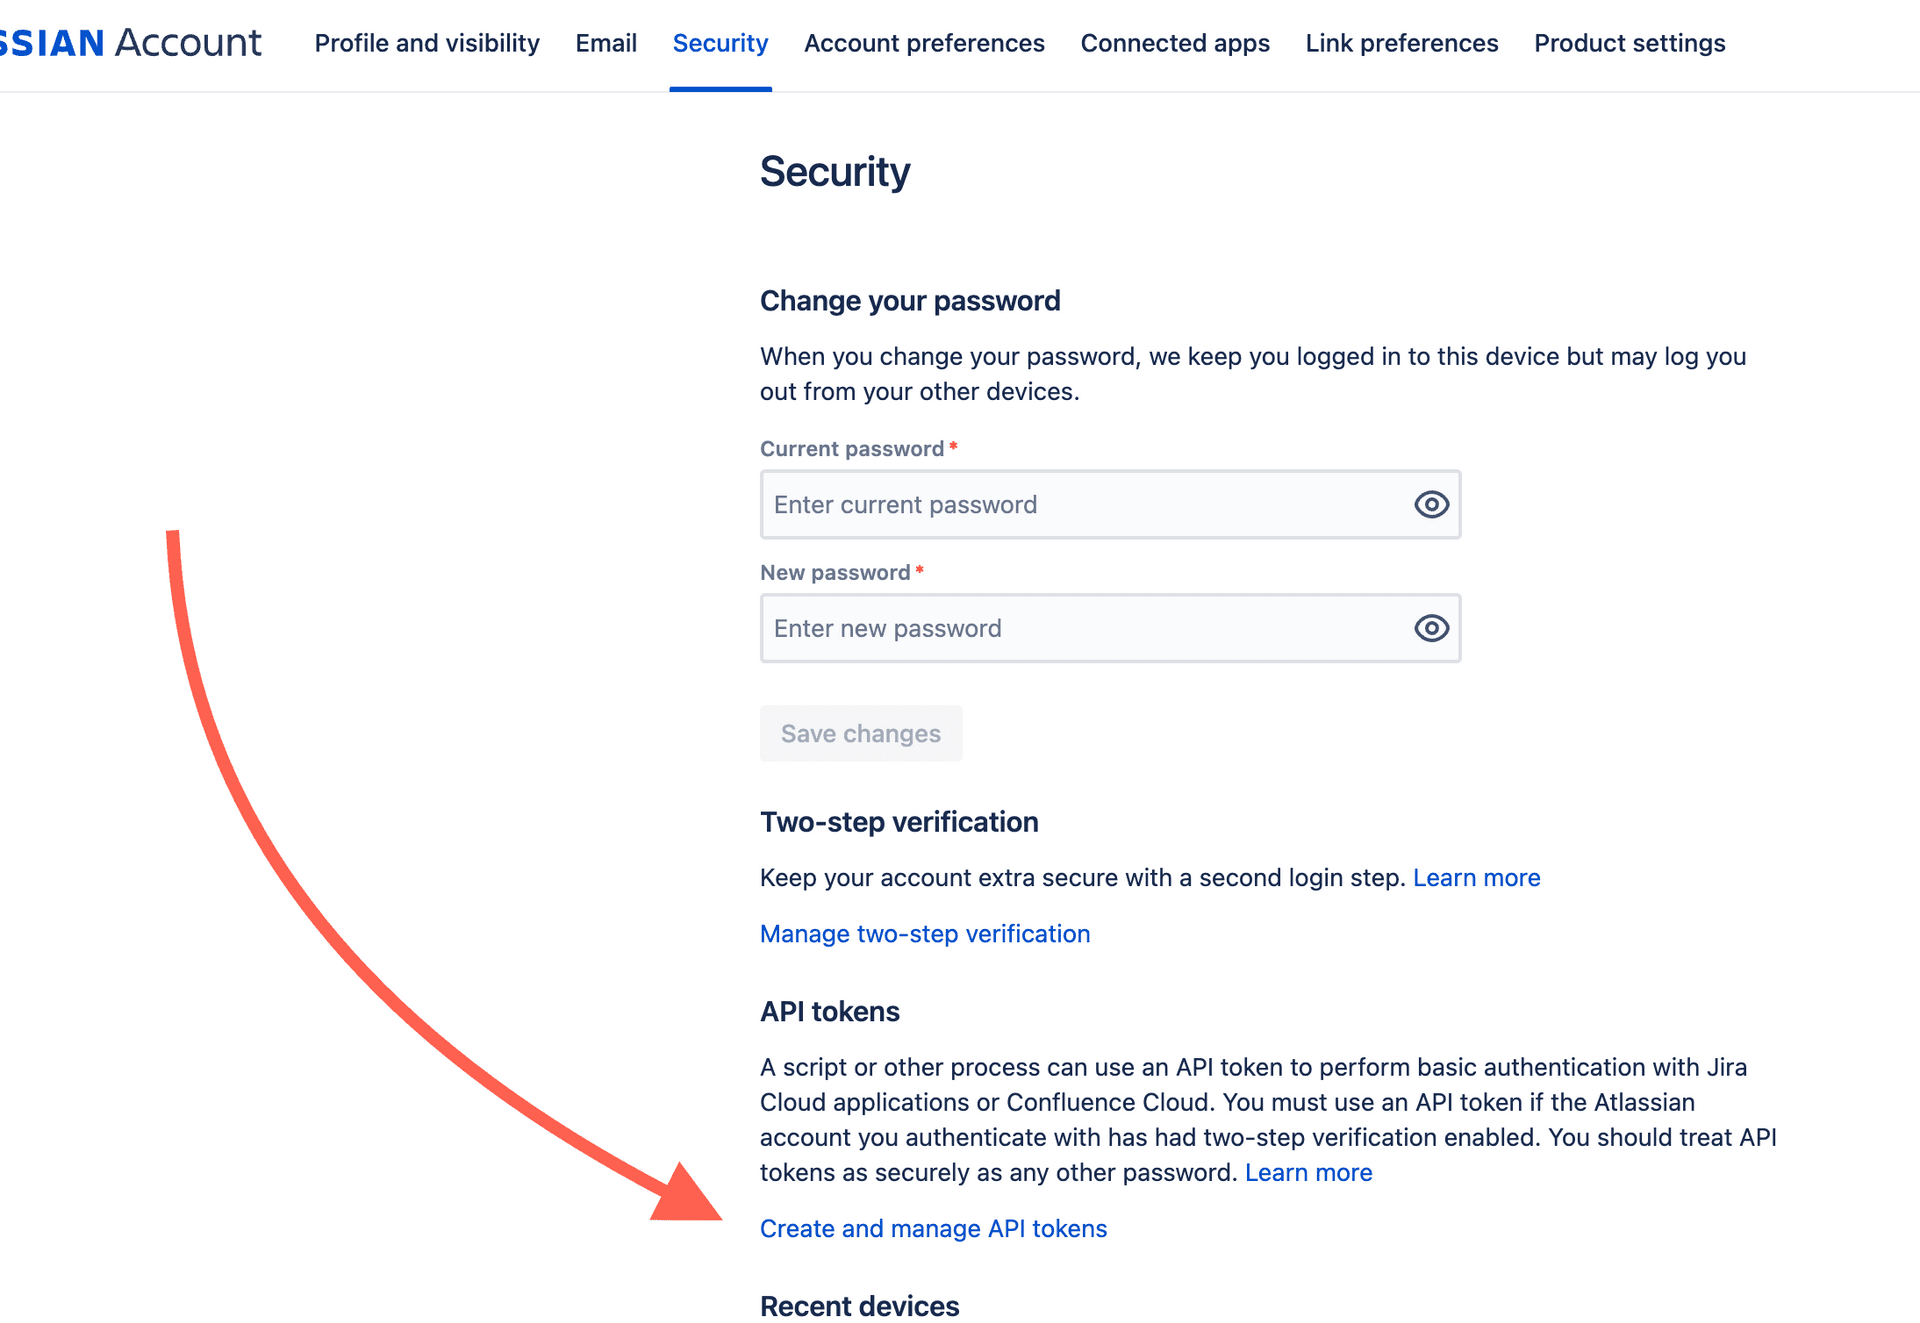
Next, navigate to the 'Security' section in the top bar. Click on Create and manage API tokens.
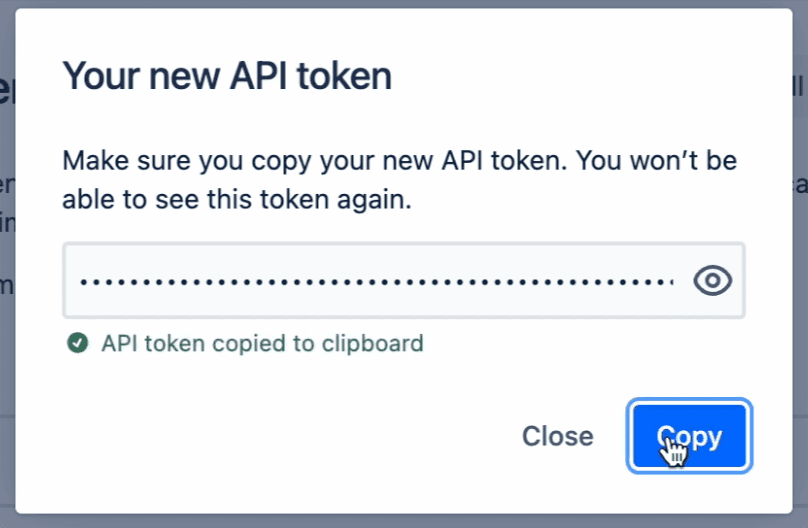
Click the Create API token button, and name it, then click Create. Copy and save the token somewhere safe.
Use the token to create a base64-encoded string using the format email:jira_api_token. You can search for an online base64 encoder or use the tool below. Don't worry, your information is secure! be sure I don't save any data.
Copy the generated base 64 string. And back at Power Bi, in the right box write Basic your_generated_string, Click OK
If PowerBI greets you with another window. Just go with the default options and continue. If all goes well, PowerBI will load a table similar to this one:
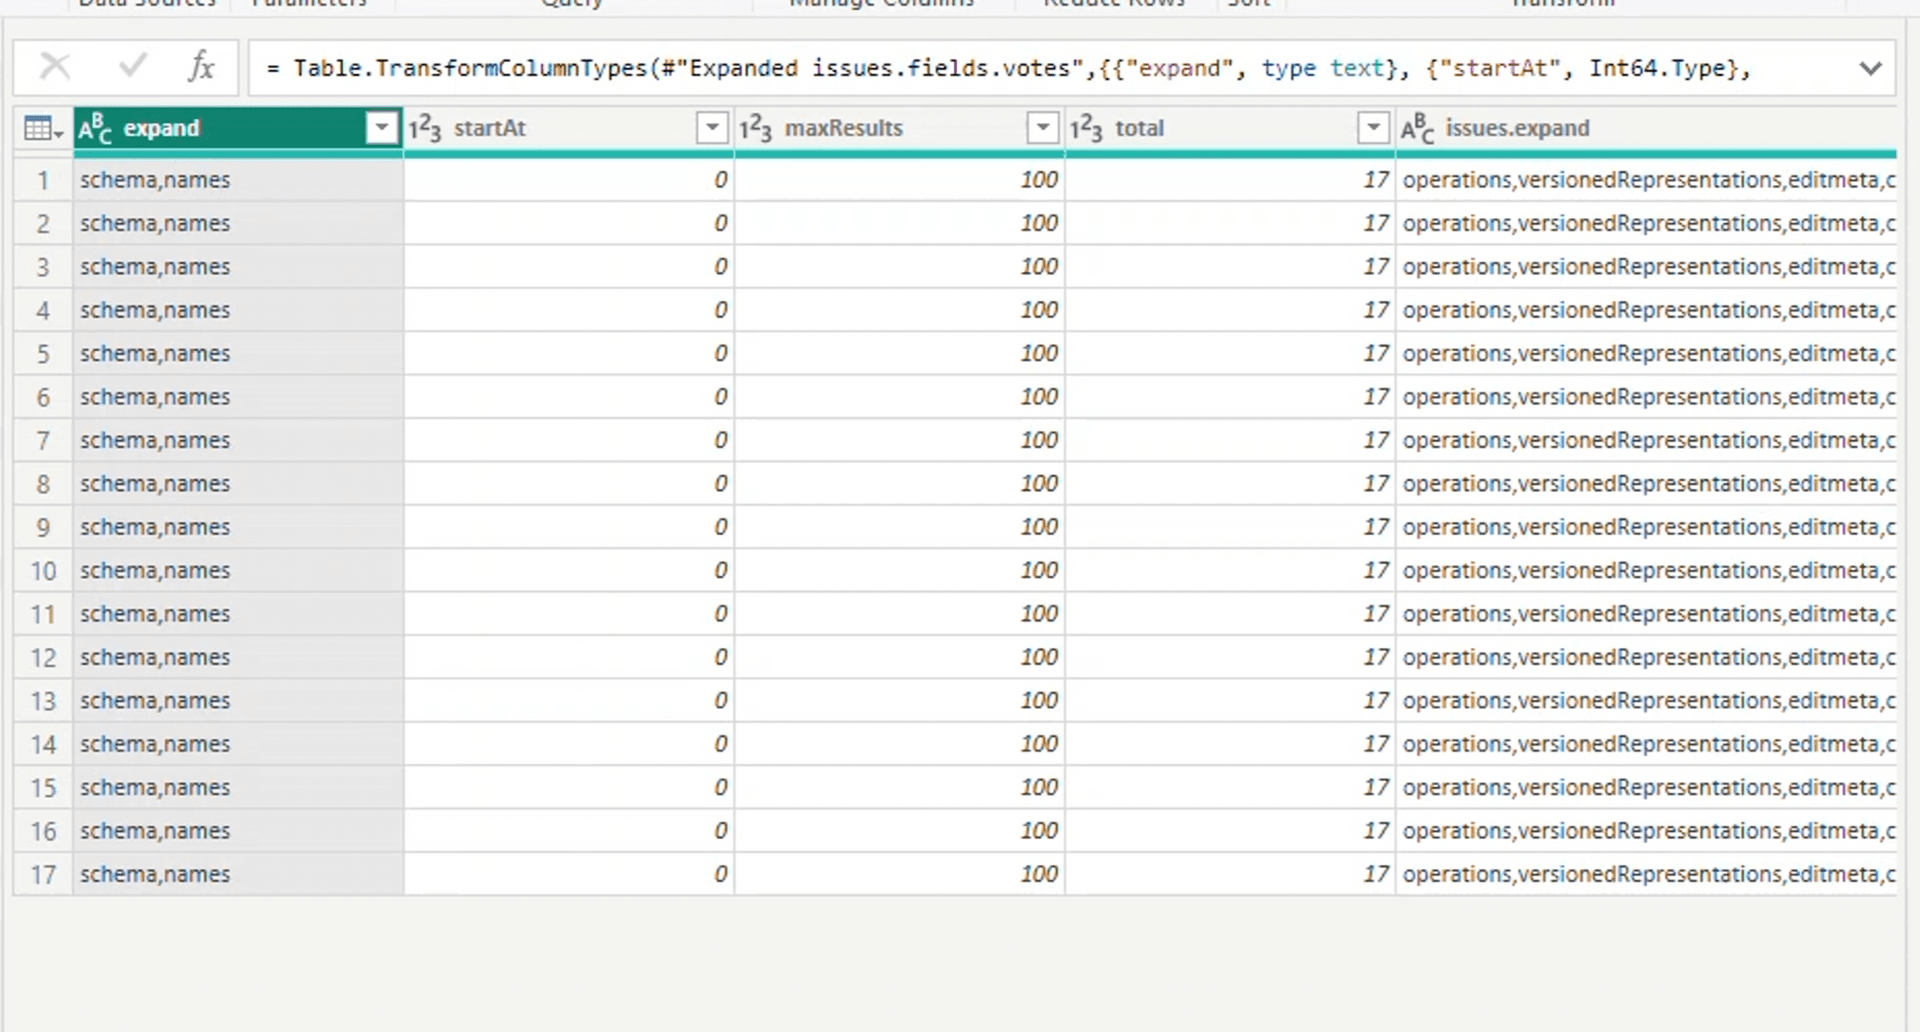
Be aware that you might encounter some challenges with certain properties. To resolve these, you'll need to utilize additional PowerBI features designed for data customization and correction.
If you're looking to import your data quickly and effortlessly, without the hassle of extra steps, asinaria.com is your go-to solution. Simply click on the button below to sign up. asinaria.com will generate a pre-formatted link for you, ensuring your data is perfectly organized and ready for immediate use in PowerBI.